24 Sep DIY: Jil Sander White Shirt

On my September List I promised to share white shirt DIY’s this month. While I originally was going to take inspiration from this Céline coat, I ended up finding a more inspiring idea during the Spring 2015 Jil Sander show. There’s nothing more perfect than a Jil Sander white shirt. I don’t know about you, but I am not the best at keeping white things, well… white. Because of this, I don’t like to spend a ton of money on white shirts, so a Jil Sander one is not a practical purchase… Which brings me to this month’s DIY.

I chose to leave the sleeves wide, it gives the style a bit of a Christophe Lemaire feeling, and makes the shirt feel a little more masculine.
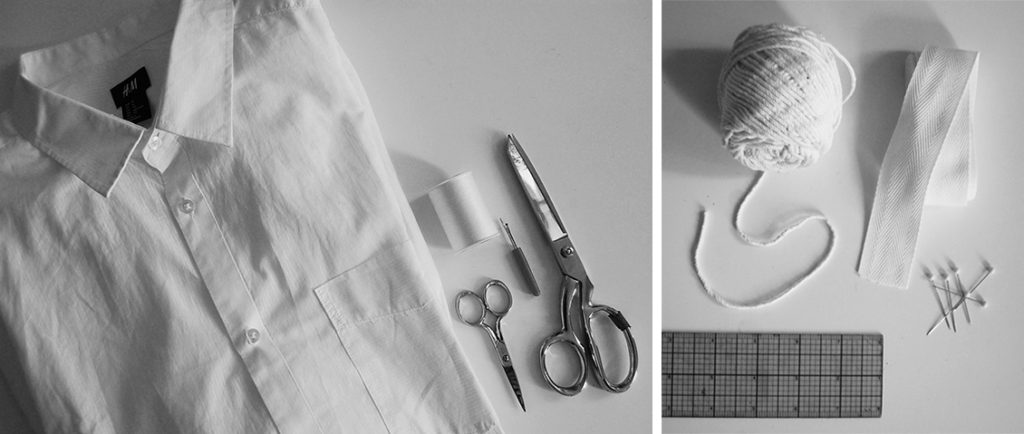
Step One // Gather your tools: 1 Men’s XL Shirt (I bought mine on sale at H&M for $7). Twill tape to make inside tunnel + chord for tie + white thread + fabric scissors + pins + ruler + seam ripper + sewing machine.
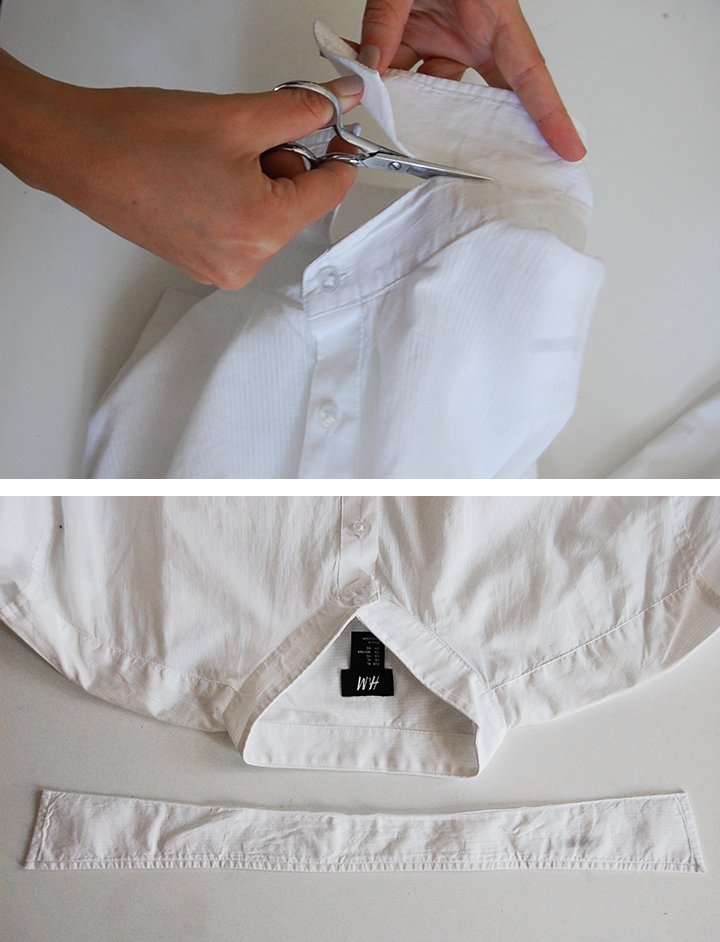
Step Two // I decided to remove the collar, so it is important to buy a shirt with a collar stand. I just cut the collar right off. There may be some fraying, but nothing too bad.
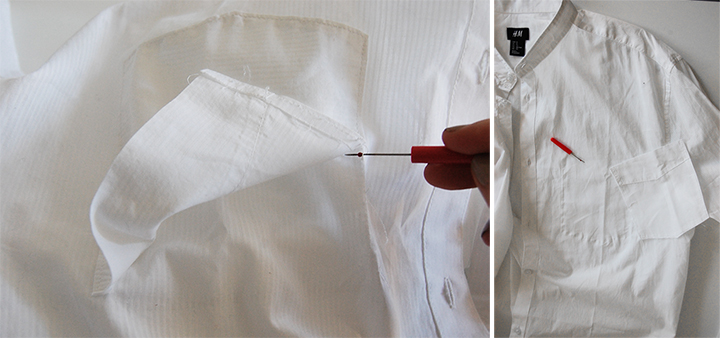
Step Three // Men’s pockets are very low when the shirt is worn on a woman. It can make you look like you have low boobs, so I used my seam ripper to remove the pocket. This may leave stitching holes, but once the garment is steamed the holes close up. You can also use your nail to move the yarns in the fabric to close the holes.
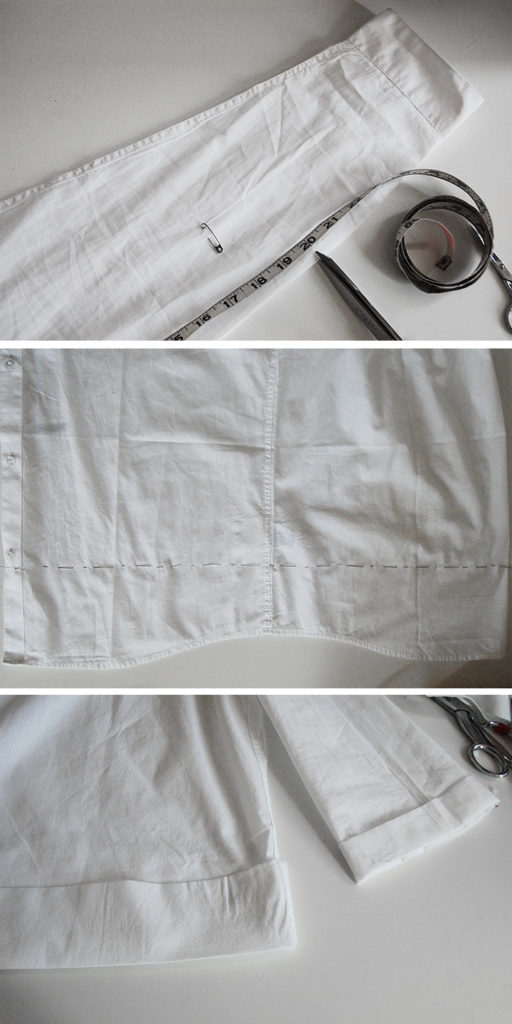
Step Four // Put the shirt on and measure how long you want your finished sleeve, mark with a pin. Also measure how long you want the shirt (note that once it is gathered it will shorten slightly) and mark it with a pin. Depending on how wide you want your hems is how much you add to the length, below your pin. I wanted a 1″ finished hem on the sleeve, so I added 2″ to the sleeve length. This way you can fold the hem up twice so it is clean finished on the inside. For the body hem, I wanted a 2 1/4″ hem, so I cut the shirt 3 1/4″ longer than my marked pin.
Step Five // After you cut the sleeve and body length, press up the hems with an iron. and stitch.
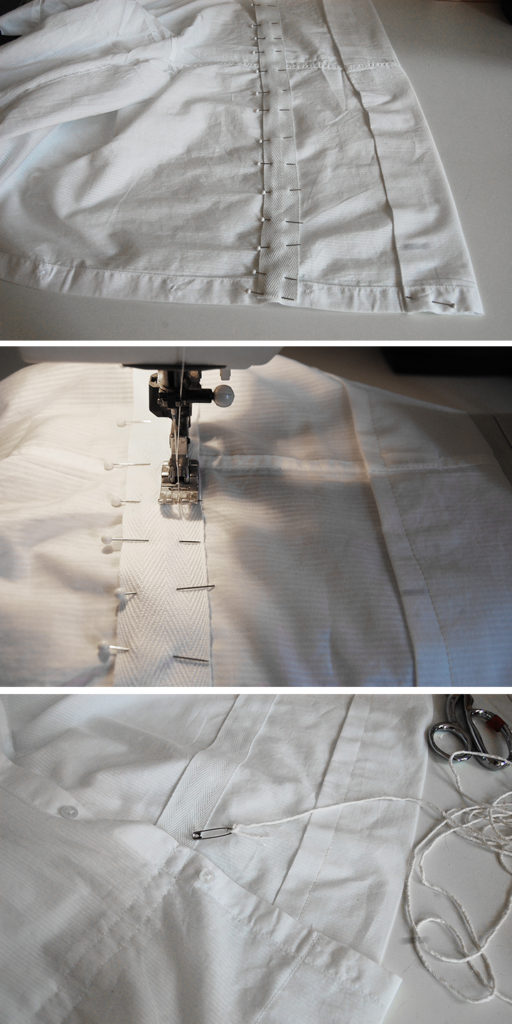
Step Six // An easy way to make a tunnel inside any garment is to use a piece of twill tape or ribbon. I had twill tape and I stitched 2 single needle rows about 3/8″ apart. This creates the tunnel. I placed the tunnel 5 1/2″ up from hem. Measuring this way will make sure you have a straight tunnel (assuming your hem is sewn straight.
Step Seven // Attach a safety-pin to the end of the chord/rope/tie you want to tunnel through the new waist. This makes it easier to thread through.

Step Eight // Press or steam your shirt to remove all wrinkles, and wear it!!
Sorry, the comment form is closed at this time.