15 Jul DIY: Prada Skinny Silk Scarf


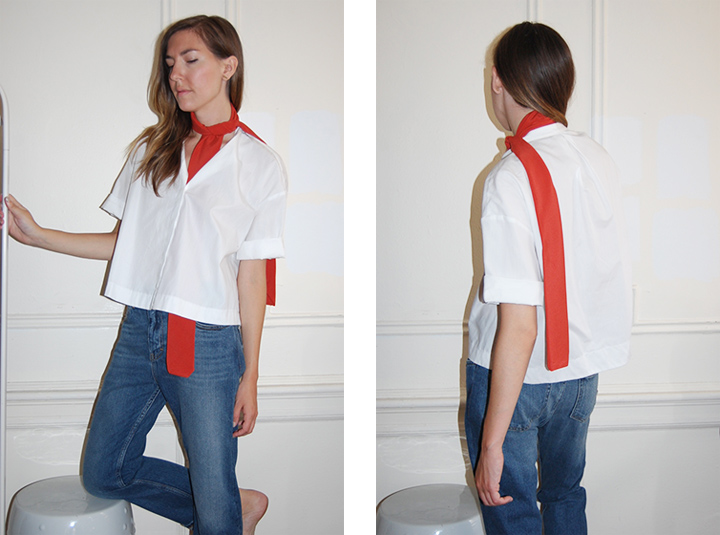
Everyone loves a simple, inexpensive way that takes your everyday look and makes it au current in an instant. The piece to do this for Fall is the skinny silk scarf we saw styled under anything and everything at the Prada Fall 2014 show. You don’t have to pay the big bucks to get THE Prada scarf, you can make your own for a fraction of the cost. Click through for the DIY Prada skinny silk scarf tutorial…
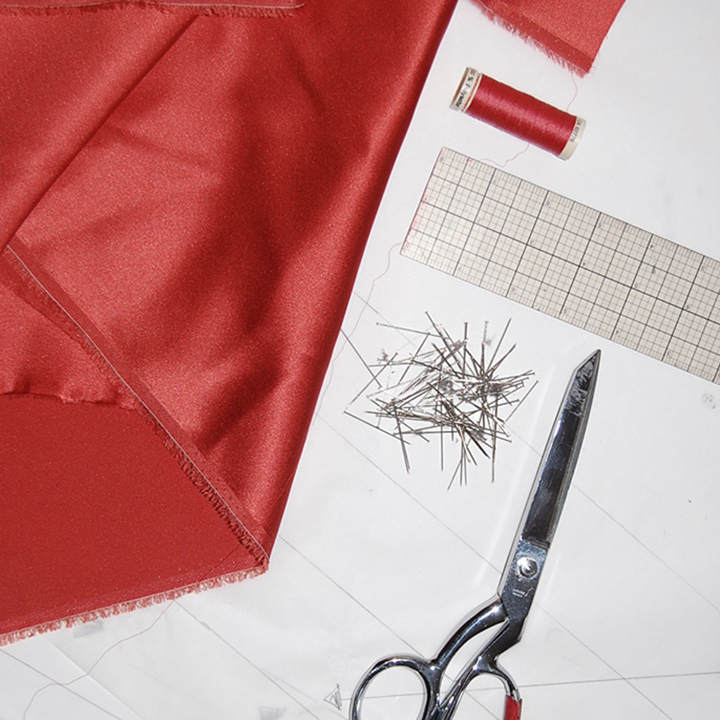
Step One // Gather your tools: 1 yard of fabric + thread to match + fabric scissors + straight pins + ruler + tissue paper + scarf pattern (see step two to download) + sewing machine. When choosing your fabric, I would recommend buying 100% silk Charmeuse. If you don’t know what it looks like, ask for help at the fabric store (other fabrics that would work include Silk Crepe de Chine, but be sure to stay away from stretch fabrics). Charmeuse fabric can be used on the shiny side or the matte side, whatever your preference. If you need some color inspiration, reference the images above from the Prada show. I’d stick to a solid color for more impact, but it’s up to you. Since I rarely wear actual color, I went for a burnt red, which will pop among my black and white wardrobe. This is a color that I could see making repeat appearances in my Fall wardrobe this year.
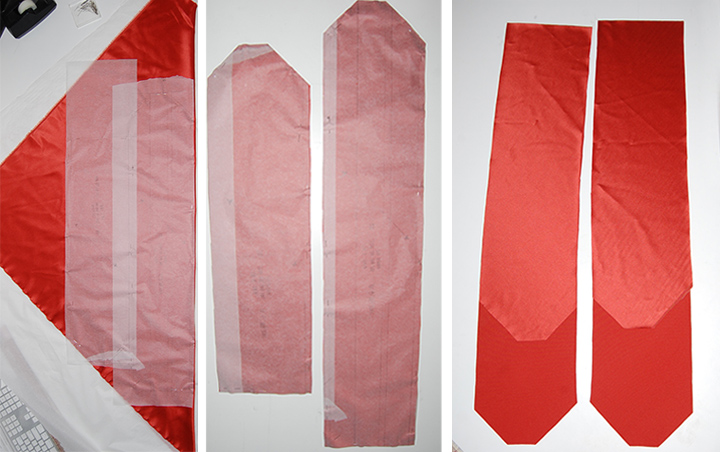
Step Two // If you bought 43-45″ wide fabric, download this scarf pattern. If you bought 58-60″ wide fabric, download this pattern. You can also make your own pattern quite quickly, the measurements are on the downloaded pattern for your reference. The patterns are different based on the fabric widths because you have to cut the scarf on bias. The 43-45″ wide fabric isn’t wide enough to get a 60″ scarf, so we must put a seam in the scarf to get the correct length. This DIY tutorial is based on 45″ wide fabric.
Step Three // Prepare the fabric for cutting. Fold the fabric on bias and layer tissue paper between the two layers of fabric, this helps keep the fabric from slipping. Once the fabric and tissue paper are laid out very flat, I place my pattern (no need to cut the pattern out before, you can leave the extra pattern paper around the edges) on top and insert pins along the inside edge of the pattern, through all layers of paper and fabric.
Step Four // Once it’s all pinned, use fabric scissors to cut through all the layers. After it is cut out you can remove the pins and lay the right sides together to make each side of the scarf. I chose to use the matte side of the fabric as the right side.
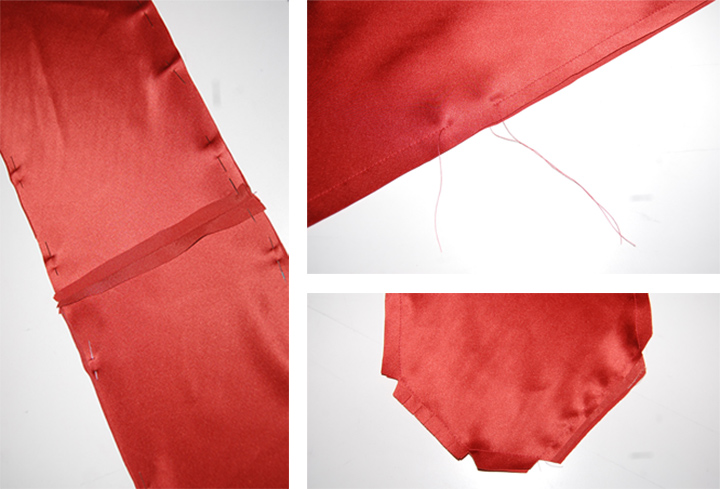
Step Five // Sew each side of scarf together, then press open.
Step Six // Put right sides together and pin all the way around the scarf leaving a 1″ opening so you can turn the scarf right side out. Sew around the edge with 3/8″ seam allowance and then clip the corners.
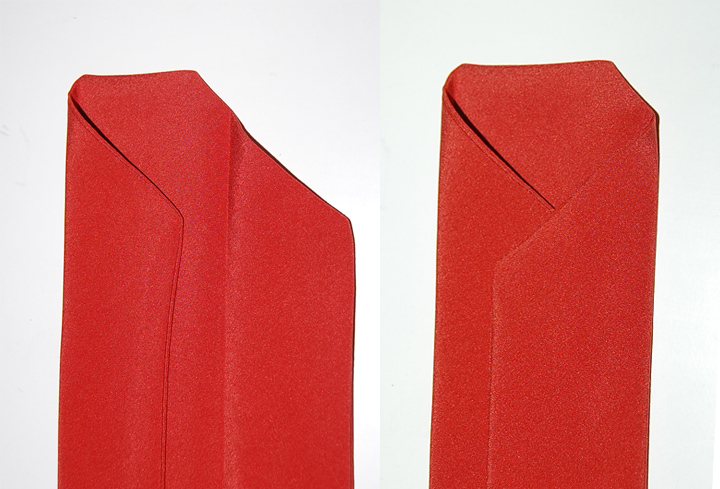
Step Seven // Through the 1″ opening, turn the scarf right side out and press the edges flat. The finished width of the scarf should be 2 1/2″ wide, press the edges back and hand tack.
Sorry, the comment form is closed at this time.